In this post, I’d like to share two ways you can use to log in to your NameCheap hosting cPanel. With cPanel, you can perform all the necessary tasks to manage your domain names and websites, such as creating new email accounts, setting up an FTP user, installing a WordPress blog, and more.
There are two ways you can use to sign in to the cPanel of your hosting plan:
– Login via your NameCheap account: use this method if you’re already logged in to your NameCheap account, as it’s very convenient (you don’t have to use cPanel credentials).
– Login using a Direct Link: this method if you are not logged in to NameCheap. Instead, you can use a direct link and provide cPanel credentials.
Let’s go through each methods in the steps described below.
1. Login via Your NameCheap Account
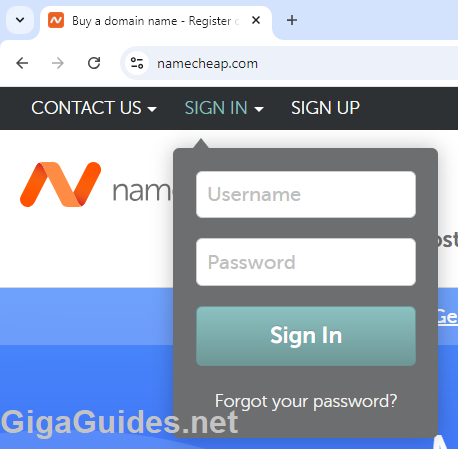
Suppose you have a NameCheap account. Go to namecheap.com, click Sign In menu at the top left corner of the page. Then, enter your username and password, and click the Sign In button:
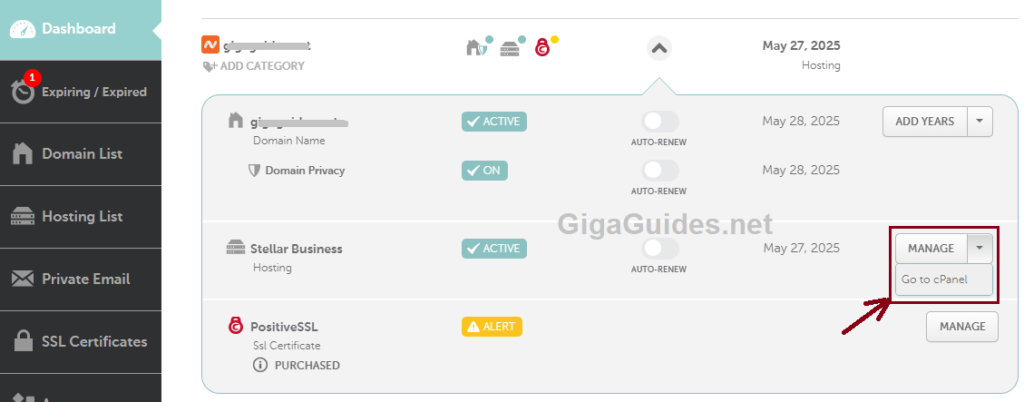
If you have a domain name registered with NameCheap, go to the Dashboard page, find the domain name, and click the down arrow button. You will then see the associated hosting plan (e.g., Stellar Business). Next, click Manage, and then click Go to cPanel, as shown below:
A new tab will open in your web browser, redirecting you to the cPanel page. Note that you don’t need to provide cPanel username and password since you’re already signed in to NameCheap.
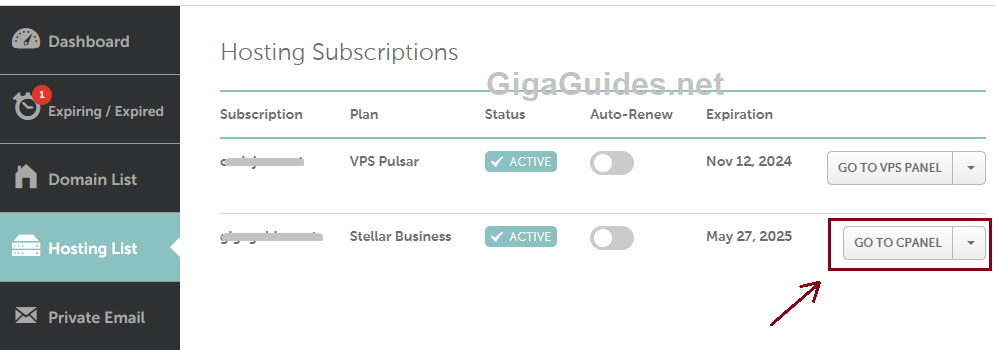
Alternatively, you can go to the Hosting List, then click the GO TO CPANEL button next to the domain name associated with the hosting plan you want to manage, as shown below:
You will also be redirected and automatically signed in to the cPanel page in a new browser tab.
2. Login using Direct Link
In this method, you need to find and open the email titled something like “Your Hosting Account Details” from NameCheap. In the email, look for the section titled “Logging in to cPanel Directly”, and check the cPanel details under that section:
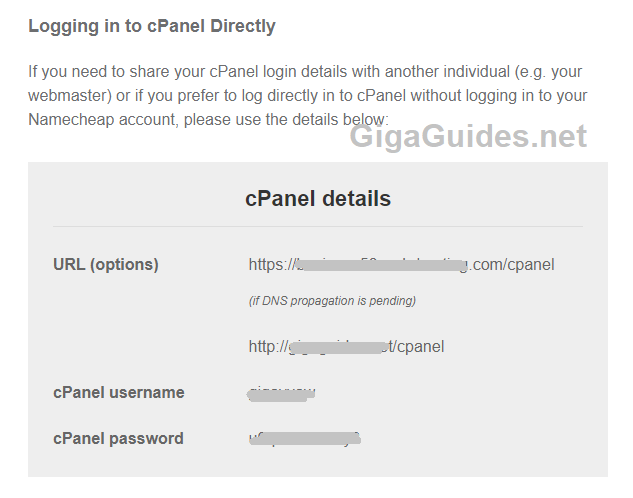
As you can see, the URL to access cPanel can be one of the following two forms:
– yourhostingplan.com/cpanel
– yourdomain.com/cpanel
Use the first URL if you have just added your domain name and the DNS propagation is still pending, or use the second URL is your domain is accessible. You’ll see the cPanel login form appears as shown below:
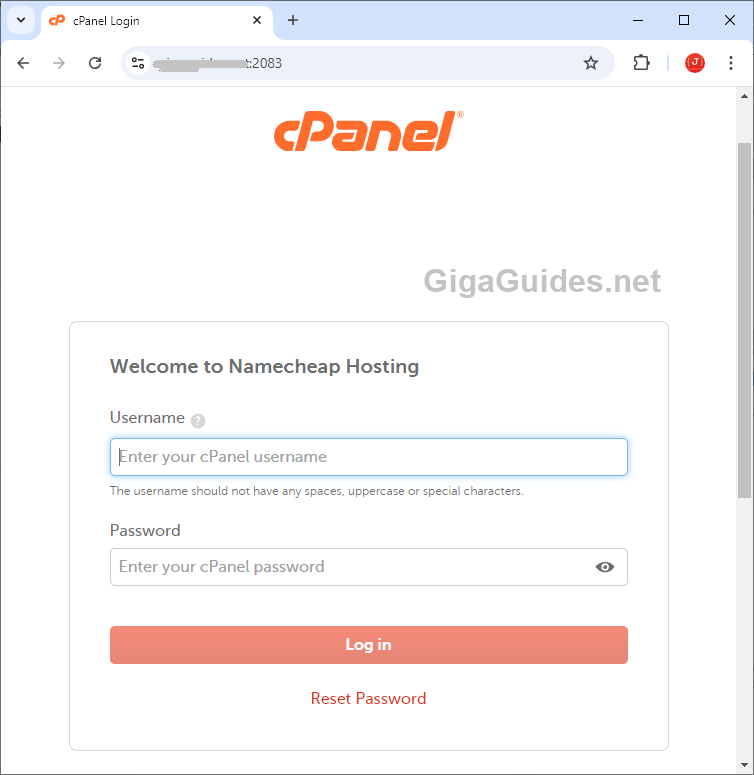
Then, use the provided cPanel username and password from the email to log in.
You can also watch the following video to see the login in action:
Summary:
In this post, you’ve seen two different ways to log in to the cPanel of your hosting account. The first method is via the NameCheap website, and the second is via a direct URL. Both are convenient and suitable for specific situations. Although this guide is specific to NameCheap hosting, you can apply the same steps with other hosting providers.
Leave a Reply